Article:
Normally, by the age of 3–4 years, children correctly pronounce the hard and soft sound “s”.
Incorrect pronunciation is called sigmatism. If you notice that your child has errors in sound pronunciation, do not delay - contact a speech therapist. After all, the sooner a defect is corrected, the easier it is to get rid of it. In this article we will talk about the types of sigmatism, the features of the correction program and exercises for sound production that you can do with your son or daughter at home.
Forms of sigmatism
Sigmatism is a defect in the pronunciation of hissing and whistling sounds, in our case “s”. There are 4 forms of violation.
The first is sigmatism itself, when “s” is absent from speech.
The second is parasigmatism, that is, when “s” is replaced with another sound.
Variants of parasigmatism:
- on “f” - labiodental;
- on “t” - toothed;
- on "sh" - hissing.
The third is the distortion of the “s” sound. There are several options: interdental (the child has a lisp, instead of “s” you hear “sh”), lateral (instead of “s” you hear “lkh”) and nasal (instead of “s” you hear a grunting or snoring sound, vowels are pronounced in a nasal voice).
The fourth is softening the hard sound “s”. It turns out like this: instead of the syllable “sa” - “sya”, “so” - “syo”, “su” - “syu”, “s” - “sya”.
Disadvantages of pronunciation of the sound [S]
- Interdental sigmatism . When pronouncing the sound [C], the end of the tongue falls between the teeth. This prevents the air stream from escaping. The blown air becomes warm. The resulting sound resembles [T].
- Nasal sigmatism . The tongue goes back, the lips are connected. The air rises to the soft palate and exits through the nose. Often, instead of [C], a similarity to [X] is heard. Here it is important to make sure that the child does not have rhinolalia or rhinophony.
- Lateral sigmatism . The tongue goes to the side. And not just to the side, but one edge of the tongue at the top, the other at the bottom. The distance between the teeth increases. Exhaled air flows from the sides. The sound produced resembles a “squelching”.
- Labial-dental sigmatism. The sound produced resembles [F]. The upper jaw comes forward. It turns out that the lower lip comes into contact with the upper teeth.
- Dental sigmatism . The sound resembles [T]. The end of the tongue simultaneously rests on the upper and lower incisors. As a result, air cannot escape freely.
- Hissing sigmatism . The end of the tongue goes deeper into the oral cavity, the back rises high, and a groove does not form in the middle of the tongue. A “hissing” appears. Reminds me of the sound [Ш] (shabaka).
In the case of parasigmatism, persistent replacements of whistling sounds occur. The softening is not [S], but [S'], also replacing with [T], [F]. Those. the sound does not resemble a certain one, due to incorrect articulation, and the child specifically replaces [C] with another sound.
Stage 1: preparation. Articulation gymnastics
Tell your baby about the activities, articulation, sounds and structure of the organs with which he pronounces them. After the theory, proceed to articulation gymnastics. It includes several exercises that need to be done in the form of a game.
"Building a fence" . The little student smiles widely so that all the teeth are open and touching each other. He says “and-and-and-and” to himself for 5 -
10 Seconds.
"Tube" . Starting position - as in the first exercise. The baby rounds his lips and pulls them forward. Holds for 10 seconds. After that it relaxes.
Repeat the exercises several times one by one.
"Open and close the fence" . The baby takes the starting position and opens his mouth, places the tongue at the bottom, and rests the tip against the lower teeth. Then he closes his mouth.
"Naughty tongue" . The student opens his mouth slightly and places his relaxed tongue on his lower lip. Spanking, he says: “La-la-la,” then bites with his teeth and says: “Tya-tya-tya.”
"Pancakes" . The baby smiles so as to open the upper teeth, the tongue is motionless and touches the corners of the mouth. Holds for 15 seconds.
“Cool the pancakes . The student smiles, as in the previous exercise. Then he blows, pronouncing the sound “f” for a long time, but without puffing out his cheeks.
"Clean teeth" . The baby opens his mouth slightly and smiles, then moves the tip of his tongue behind his lower teeth to the sides without moving his jaw. You can “clean” the outer and inner surfaces of your teeth.
"Slide" . The student opens his mouth slightly, rests the tip of his tongue on the lower teeth, lifts the back of the tongue, and presses the side surfaces against the upper teeth. Fixes the position for 15 seconds, after which he bites the upper part of the tongue and rolls his teeth down along the tongue, as if on a slide.
"Magic wand" . The baby opens his mouth, smiles and tenses the tip of his tongue. Then he presses it against his lower teeth. The speech therapist or parent places a match or counting stick along the center of the tongue. Then the student clenches his teeth and exhales forcefully. The result will be a drawn-out “s”.
The exercise must be repeated first with a match, then without it.
Articulation of sound [C]
The sound [S] is a consonant, deaf, hard, front-lingual. Normally, by the age of four, children have formed the correct pronunciation of whistling sounds.
Articulation of sound [C] The lips are stretched in a wide smile, teeth are visible, between which there is a distance of about 2 mm. The end of the tongue rests on the lower incisors, the back of the tongue takes the “slide” position. A groove is formed in the middle of the tongue, through which a cold stream of air flows. We don't use our voice.
Stage 2: selecting correction techniques
Correction depends on the shape of the defect. We will talk about universal techniques that can be used for staging in any case. These include imitation, the use of reference sounds and mechanical influence.
Imitation technique
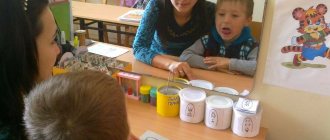
Imitation training is effective for minor defects in sound pronunciation in children. Show your child how to pronounce the hard sound “s” correctly. To do this, sit both in front of the mirror so that he can see both himself and you. Next, give your child the following instructions:
- Open your mouth and smile.
- Spread the tongue, tense its tip and rest it on the lower teeth (incisors).
- Let the “breeze” pass through your tongue. The result should be "c".
Young children absorb information and master skills better through play. Come up with them for your child! For example, you can pump up a bicycle tire, deflate a balloon, blow into a bottle with a narrow neck, or blow like a sea breeze - all these actions are accompanied by the sound "sssssss."
Technique of staging from reference sounds
If the child pronounces other sounds well, you can build on them. In the case of sigmatism, the reference sounds are the soft “s” and the interdental “s”.
We use the soft sound “s”.
First, ask your son or daughter to pronounce the sound “s” and see where the tongue is located at this time - the correction depends on this.
- The tongue is located at the top - it rests on the incisors. You can teach your child the correct pronunciation of sounds. To do this, the adult opens his mouth and says “s”, the baby watches and repeats after him.
- The tongue is located below - rests on the teeth. The child is taught to pronounce “s” from the correct articulatory position - the tip of the tongue is on top.
When the baby has learned this, the skill needs to be finally consolidated. This is facilitated by staging exercises.
We pull the sound . The baby smiles and says “s” for a long time. At this time, he himself or the adult below puts his palm to his mouth. When making sounds, slightly cool air should flow.
Rounding the lips . Continuing to do the exercise and holding his palm to his mouth, the baby rounds his lips and pulls them into a tube, as if to pronounce “y”. An adult can show by example how this is done. The mouth should not be opened wide.
We monitor the air . The main condition is that the air flow must be continuous when performing all actions. Moreover, it gets warmer over time.
We reach a solid “c”. If the baby is unable to pronounce it automatically, the adult explains that the task now is to “warm up” the air in the palm. Then everything will work out.
We say "su" . This is an auxiliary exercise that will help your child achieve the desired hard “c”. We monitor the hot air.
We say a hard “s” . As soon as the result is obtained, show with your example: move your lips forward, as if you are going to say “y-y-y-y”, clench your teeth. This will “affirm” the “s” even more. If the baby presses his tongue tightly against his upper teeth, it will be even easier for him.
We consolidate the result. Introduce the learned sound in syllables with all vowels.
We start from the interdental reference sound “s”
Does the baby stick his tongue between his teeth, pronouncing “s”? Look where exactly the tongue is located:
- There is a “groove” along the tongue; the baby places the tongue between the teeth. Show your child how to hide it behind his teeth and say “s” yourself so that the baby can see;
- There is no “groove”, the tongue is flat. First of all, you need to establish correct interdental sound pronunciation. An adult should not say “c” out loud.
In this case, the following step-by-step production of the sound “s” is used.
Correct articulatory posture . The student needs to spread it out and stick it between his teeth. Move the tip of the tongue forward or position it at the level of the incisors. Then smile widely with closed lips and, ideally, bite the sides of the tongue.
We blow into our palms. The main thing is that the air stream should be as cold as possible. This will create the necessary “groove”. The baby should smile continuously; you can hold the upper lip with your finger - this will make it easier. If he does everything correctly, a whistling sound will be heard.
We whistle like a mosquito . Sit the baby in front of the mirror, show him the “groove” and explain that thanks to it the baby can whistle. But that’s how a big mosquito whistles, and you need to learn to speak like a small one - in a thin voice.
Finally we put “c”:
- The student continuously “whistles.” It is better if he controls this process by looking in the mirror. The main thing is that the “groove” must remain in place.
- Slowly removes the tongue behind the upper incisors and presses it against them from the inside. The adult shows how to do this, but does not say “s”.
- The baby almost achieves the correct sound pronunciation. Then he opens his mouth and the correct pronunciation is heard.
When the student correctly pronounces “s” in isolation, begin to introduce it into speech: first in syllables, then in words.
Mechanical impact
For setting, use counting sticks, blunted toothpicks, matches - any of the listed tools will do.
One of the ways is this. The baby places his wide tongue below, its tip resting on the lower incisors. An adult places a match in the middle of the tongue. After this, the child brings his palm to his mouth, bites the match and smoothly but forcefully blows out air so that he can feel it on the skin of his palm.
If “s” is heard at the same time, it is practiced with a match, and then without it.
Here are a few points to keep in mind when doing the “c” exercise:
First, insert the match into the baby’s mouth 2 cm, and if the tongue dodges, a little deeper.
Secondly, when pressed with a match, the little student begins to whistle with a “lisp.” Ask him to press his lips together so that only the match passes through, but do not let him bite it. The tongue remains in the mouth behind the teeth. The baby blows on the tip of his tongue so that the exhalation passes between the teeth.
Thirdly, control the pressure with the match. Try pressing harder or weaker, deeper or at the very tip of the tongue - this way you will find the position in which your child will get the perfect sound pronunciation.
Fourth, when you place the isolated “s” sound, begin to introduce it into speech. First - into syllables, and then into words. If the baby makes a mistake again when pronouncing the words, connect the match.
Engage with your child in the form of a game: draw analogies with cartoon characters, show pictures, interesting stories.
Stage 3: automation, or consolidation
Mastering correct sound pronunciation in isolation from speech is only the first stage of learning. Next, it is important to consolidate it and bring it to such automatism that the child correctly pronounces the new sound in words and phrases.
First work on the production in syllables, then in words, with “s” at the beginning, middle and end of words. After that, move on to proposals.
General recommendations
To get rid of sigmatism through the use of articulatory gymnastics for the sounds [З], [С], [Ц] you need to follow simple rules:
- Start your exercises with a warm-up. Slap your tongue, stretch your lips, cheeks.
- Start with easy exercises and end with difficult ones.
- Use funny poems and memorize texts with your children.
- Help your tongue take the desired position with your fingers, a pencil, or a spatula.
- Do articulation exercises in front of a mirror.
How to teach a 3-4 year old child to pronounce the whistling sounds S and Z correctly? Video
If a child is good at articulatory gymnastics movements, then, as a rule, a few simple techniques will allow him to almost immediately learn how to correctly pronounce the whistling sounds s and z. You will learn how you can teach your child at home to correctly pronounce the sound s and correct its pronunciation from Irina Denisova’s video. She shares some professional speech therapy secrets with her parents.
If you managed to successfully evoke a sound, then all that remains is to automate its correct pronunciation in syllables, words and phrases. You can learn about games and exercises for automating the sounds C and Сь in a child’s speech in the article
"Automation of whistling sounds С and Сь"
If a child’s pronunciation of many sounds is impaired, he finds it very difficult to do articulation exercises, and cannot produce the “correct” sound, then you definitely need to contact a speech therapist at a children’s clinic or speech therapy kindergarten. You can always find out the addresses of all institutions where you can get help from a speech therapist free of charge from your district or city education department.
And at the end of the article there are several songs for speech lessons with children based on the sound s.


