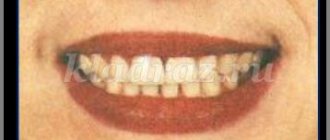
When a child tries complementary feeding, it is very important not only to select high-quality products, but also to present them beautifully. A person’s eating behavior depends on how food is served. Perhaps you yourself have noticed: the prettier the appearance and table setting, the more pleasure we get from food, the better we concentrate on eating. And this, in turn, affects our health.
Therefore, when a child receives complementary foods or begins to eat on his own, it is important that he already has his own set of dishes.
Requirements for children's dishes
• Safe material is the first thing the manufacturer must guarantee. It is better to choose plates, cups and other kitchen utensils for baby food in an official store and from trusted manufacturers. It should be taken into account that some materials are unsuitable for food. For example, polyvinyl chloride, melamine and plastics containing bisphenol-A should not be used for storing food or feeding a child. Polystyrene cannot be heated.
• Labeling. The packaging or the product itself must contain indications: what this plate or cup is made of, what products it is intended for, what the conditions of its use are.
• The quality must be high, scratches, nicks, cracks and chips are unacceptable. If the paint is unevenly applied or erased on the product, it is better to choose something else for the child.
• Convenience and practicality. The design should be thought out so that it is pleasant for both you and the child to use the dishes, and easy to care for.
Materials
To make children's dishes, plastic, silicone, bamboo, porcelain, ceramics, glass, and metal are usually used.
• Plastic dishes are durable and lightweight; it's easy to wash. Heat-resistant plastic marked in the form of waves, the inscription “micro”, 5 or PP (polypropylene can withstand temperatures of 100 ° C) can be washed in the dishwasher and heated in the microwave. Plus, it's pretty easy to find a beautiful set designed in a way your little one will love.
• The silicone plate cannot be broken. Food grade silicone is safe and can be used to heat food in the microwave. It is easy to clean by hand or in the dishwasher. The silicone plate does not slip on the surface, it is convenient for the child’s first experiments in eating independently.
• Bamboo tableware is made from natural material, lightweight and durable. But you cannot heat it in a microwave oven or put it in the dishwasher, like plastic or glass. Firstly, because of the glue and resins that are used in production, and secondly, because this deteriorates the bamboo coating. But if you protect bamboo dishes from heat and wash them by hand without abrasives, they will last a long time.
• Children's porcelain is safe and durable. But at the same time he is fragile. Modern porcelain can withstand heating up to 110-160° C. Therefore, it can be used to heat dishes in the microwave (if there is no gold plated on it) and washed in the dishwasher. It is better not to give porcelain to very young children for independent use.
• Ceramic is heavier than porcelain, but also more durable. Food in a ceramic plate stays warm longer. Ceramic cookware is microwave and dishwasher safe.
• Glassware for children is wear-resistant, impact-resistant, safe, and can withstand dishwashers and microwave ovens. However, glass is sensitive to temperature changes and may burst if, for example, you pour hot soup into a cold plate. If a child accidentally breaks a plate, the pieces will not be sharp and will be easy to collect.
• Metal utensils are strong, durable and convenient to take on trips with your child. But it can get hot, so you need to make sure your baby doesn’t get burned. You can only put a metal plate or cup in the dishwasher if it is made of stainless material.
We knit a heating pad for the “Fairytale House” teapot. Part 1
I think you will agree with me that we are all a little children at heart. I really love fairy tales. I love watching them, reading them, and... making things. But since I am also a fairly practical person (at least, I try to be so), I like to combine fairy tales and everyday life. Maybe you would like to create a piece of a completely practical fairy tale by knitting a hot water bottle for a “Fairytale House” teapot. This warmer will keep the tea warm, lift your spirits, and become a real decoration for your kitchen. And of course this is a wonderful gift for family and friends.
As in my previous master classes on heating pads, I defined the difficulty of the work as medium. Everyone has different shapes and sizes of teapots. As you work, you will have to empirically determine the number of increases and rows.
Another difficulty is that there are many small parts on the heating pad, which are best made from thin yarn. Therefore, to knit and sew all this beauty, it will take quite a lot of time and patience.
But it is these details that will make your house one and only.
I got this hot water bottle!
Materials:
- yarn of different colors and thickness;
- black yarn for windows;
- brown yarn for the door;
- thin yarn (cotton is best - “iris”, “chamomile”, “coco”, “rose”) for flowers and leaves;
- beads, beads, sequins and the like for finishing the product;
- wire and two beads for the snail's eyes;
- snail body filler;
Read more about yarn in the text.
- Moment Crystal glue or other universal transparent glue;
- monofilament or thin thread to match the color of the yarn (it is convenient to use floss of different colors).
Optional:
- acrylic paints;
- charms (metal pendants in the form of a lock, key, teapot).
Tools:
- crochet hooks;
- sewing needles;
- a needle with a large eye (the so-called “gypsy”);
- brushes for acrylic paints.
Terms in the text:
- increase - two stitches in one loop; decrease - knit two loops together;
- amigurumi ring - we wrap yarn around our finger (two turns), and tie the resulting ring with single crochets. Remove it from your finger and tighten it by pulling the free end of the thread.
We knit the parts of the heating pad in a spiral, that is, without lifting loops (unless otherwise indicated).
For the base of the heating pad, acrylic, half-wool or wool yarn of medium thickness is best suited.
I knit houses from Alize ecolana (100% wool, 220 m/100 g), Alize lanagold (wool blend, 240 m/100 g), Alize fine (wool blend, 390 m/100 g) yarn in two threads.
The larger the kettle and, accordingly, the larger the heating pad, the thicker the yarn you need to use so that the heating pad holds its shape well.
I knitted a heating pad for this teapot.
Roof
Attention! We knit in the back half loop.
1) We knit six single crochets into an amigurumi ring (first row).
We knit five rows, making one increase per row, starting from the second row.
Next, we knit several rows, making one increase in each row. The number of rows depends on how high you want the top of the roof to be. The photo shows how long the top of my heating pad turned out after I knitted 12 rows (photo A) .
Then we knit, making two increases per row, three increases and so on (photo B) .
While knitting, we try on the roof on the teapot.
And so, our roof began to look like a wizard’s hat and completely covers the lid of the kettle (in my case, also the sides).
Now we knit, making six increases in each row, forming the brim of the hat (I forgot to take a photo, but the following photos show what we get in the end).
Don't get too carried away! The brim should not cover the nose and prevent you from grasping the handle!
We finish knitting with a connecting stitch. We do not cut the thread.
Our roof has a ribbed pattern due to the unknitted half-loops.
2) We unfold the knitting and knit connecting stitches on these unknitted half-loops, moving towards the beginning of the knitting (photo A-B) .
After finishing knitting, leave a long “tail” of yarn.
We thread the tail into the needle and pass it along the entire fabric to the edge of the knitting.
Pull it up so that the top of the head bends. We secure it with a knot on the wrong side of the knitting (photo A) .
3) We tie the edge of the roof with yarn of a different color. I made a binding in two threads, single crochet, with Alize softy (100% micropolyester) (photo B) .
The roof is ready!
House base
1) We put the roof on the kettle and use pins to mark the places where the roof comes into contact with the kettle.
2) We turn the knitting inside out towards us and, along the circle marked with pins, we knit a series of connecting stitches (chain stitch) with the same yarn that was used to knit the roof (marked in gray in the photo).
If you, like me, knitted the roof in two threads, then make the chain stitch with one thread.
To keep the pins out of the way, you can remove them by first drawing a circle with a disappearing marker or chalk.
3) Attach yarn of a different color and knit on the resulting loops with single crochets.
Then we knit as I have already described in detail in my previous master classes.
However, I will repeat some points.
When we have knitted to the upper bases of the spout and handle, we knit the two sides of the heating pad separately (if the spout and handle are on the same or almost the same level). Thus, I knitted the “Sheep on a Hill” warmer. But on this kettle, the upper base of the handle is higher than the spout. Therefore, I continued knitting in turning rows with one fabric. For the cutout under the handle, I left three loops undone.
Having knitted it to the upper base of the spout, I continued to knit the two halves (sides) of the heating pad separately.
My kettle is almost straight at the top. That's why I knitted without increases. I began making increases (one in each row, on each side of the heating pad) when the kettle began to expand.
When knitting, try the heating pad on the teapot more often and adjust the number of increases according to the shape of the teapot.
When you have knitted the first half, knit a chain of air loops; we will then need it to connect the two halves of the heating pad.
When knitting the first half of the warmer, I recommend writing down how many increases you made. Then you can easily tie the second half symmetrically to the first.
4) When both halves of the heating pad are connected, we connect them with chains of air loops under the spout (photo A) and under the handle (photo B) .
The shape of this teapot allows you to knit a heating pad without a button. But, nevertheless, I made the hole for the handle large enough so that the heating pad could be removed and put on without any problems.
If you want to make a heating pad with a clasp under the handle, then watch the master class “Knitting a heating pad for a Hedgehog teapot.”
5) Next we knit in a spiral again. We finish knitting a little short of reaching the bottom.
6) We make the binding with lush columns.
I knitted with Alize softy yarn.
Lush columns. We knit a single crochet into the first loop of the row. In the second loop we knit a fluffy stitch of 3-5 double crochets, then we knit an air loop and again a single crochet in the third loop of the row. Thus, we knit the entire row. A more embossed pattern is obtained if between the lush columns you knit not a single crochet, but a connecting column.
7) We tie the holes for the spout and handle with 2-3 rows of single crochet stitches and one row of connecting stitches (you can tie it in a “crawfish step”).
The base of the house is ready!
Before further work, it is worth moistening the heating pad from the spray bottle and drying it by placing it on the kettle.
Windows
1) We knit the windows with single crochets according to a circle pattern. Make increments offset so that you don’t end up with a hexagon.
I knitted windows from Iris yarn.
Determine the size of the circle yourself, based on the size of your house.
2) Using colored yarn, knit two chains of air loops.
When knitting the second chain, knit the middle loop through the middle loop of the first chain, forming a window binding (photo A) .
3) Using a hook, attach the binding to the window (photo B) .
The tails can be secured with knots on the wrong side or hidden when knitting the frame.
4) Knit a series of connecting posts along the edge of the window (photo B).
5) Knit a row of single crochets, inserting the hook into the middle of each loop of the chain (photo D) . The result is a window frame.
If you are knitting a frame from thicker yarn than you knitted the window itself, then knit without increases. If the yarn is the same thickness, then make six increases as with regular knitting in the round.
Our windows are ready!
Door
I knit by eye. But you can pre-calculate the number of hinges you will need to knit the door.
1) We knit the door according to the semi-oval pattern. The number of rows in the diagram is arbitrary - knit as many rows as necessary for the desired door size.
I knitted a door from medium-thick wool yarn (I don’t know the brand and yardage, since it was leftovers). It is quite possible to knit from other yarn, the main thing is that it is the right color and not very thick.
The door is ready (photo A).
2) Embroider the loops (photo B) . I used Tulip YarnArt yarn.
3) Make a handle for the door. To do this, fasten the thread on the wrong side and bring it to the front side.
Take some stick of suitable thickness (mine is a hook) and make a few stitches, as if sewing the stick to the canvas.
I made the door with a lock, so with each stitch I passed the thread through the lock shackle.
Fasten the thread to the wrong side and bring it back to the right side.
Pull out the stick and wrap the resulting loop. Place the coils close to each other, without overlapping.
After finishing the winding, bring the thread to the wrong side and fasten.
Warmer design
1) We sew windows and doors.
2) We knit the outer frame.
We lay a chain stitch around the window ( colored photo A
We knit one row of single crochets. When knitting, make 4-5 increases so that the frame does not twist towards the window.
Make one row of connecting posts (photo B).
3) We design the door in the same way. We knit in different stitches, forming a visor. On the roundings we make 1-2 increments symmetrically.
This is what happens.
4) On the other side of the heating pad we also make a window.
5) We knit mushrooms. How to knit and sew fly agaric mushrooms, see the master class on a heating pad “Knitting a heating pad for a Hedgehog teapot” (link given above) or, if you need larger mushrooms, in the master class “Crocheting a pincushion “For mushrooms”.
Decorating the house
Decorate the house to your liking. There are a huge number of diagrams of all kinds of flowers, twigs, leaves on the Internet.
And I will show you how I decorate my houses.
We knit the leaves according to the pattern. If you need longer leaves, then increase the length of the initial chain and, accordingly, the number of double crochets.
Beautiful leaves are obtained from section-dyed yarn. But you can tint the leaves yourself. To do this, moisten the leaves. Using dark green acrylic paint diluted to ink, tint the bases of the leaves.
How to knit flowers is shown in master classes on knitting a Hedgehog warmer and a Mushroom pincushion. Links are given above.
Sew the leaves along the central vein 2/3 of the way. At the same time, the edges and tip of the leaf remain free and the leaf looks more alive.
The centers of the flowers can be embroidered with beads, a bead or sequins can be sewn on.
You can make berries from beads.
Imagine!
How to knit a snail is shown in the second part of the master class “For mushrooms” (link above).
This snail is knitted in the same way, but from a different yarn.
Shell made of Alize fine, “Children's Novelty” yarn (acrylic, 200 m/50 g). Accordingly, I took larger beads for the eyes.
We sew the snail to the roof along the entire perimeter of the body. Additionally, use a few stitches to sew the shell to the side of the roof so that the snail does not fall to the side.
This is what the heating pad looks like from different sides.
The second part of the master class will be more of an addition. I will show you different design options for heating pads.
I also want to immediately answer a couple of questions that often arise.
I buy the charms (metal pendants) that I use to decorate the warmer here, at the Crafts Fair. They are quite inexpensive. I use wire cutters to bite off the loop at the locks.
Sometimes people ask me if it is possible to put up for sale items made using my master classes. I answer - of course you can! The only thing I will be very pleased if you provide a link to the master class. But this, again, is at your discretion.
Good luck! Warmth and comfort to your home!
The continuation of the master class can be read here: We knit a heating pad for the “Fairytale House” teapot. Part 2
How to choose dishes for children
Choose dishes according to age. If a child is just learning to eat independently, then it is better to take unbreakable utensils and plates that cannot be scratched. To prevent the dishes from slipping, you can place a special anti-slip mat for feeding children under them.
Sometimes a child who is accustomed to drinking water, juices, or formula from a baby bottle may find it difficult to start drinking from a cup. Therefore, for the first time, you can use a sippy cup in the form of a mug with a specially shaped lid. Gradually, she will teach the child to drink water correctly from a regular cup.
Didactic game “Glue the teapot”
Tatyana Ermakova
Didactic game “Glue the teapot”
educational task: to teach children to visually dismember an image of an object into parts, to compose an object from parts, to determine not only the shape of objects, but also the shape of the cut-off part of the picture. When completing the task, children must learn to use the model and correlate individual parts of the picture with it.
Material. Picture-drawing with an image of a teapot . Pictures with an outline image of the same teapot , cut into two and four parts, the cuts are made in a straight line (rectangles and squares)
and diagonally
(triangles)
;
a teapot made of parts (body, lid, spout, handle; a teapot made of “shards” of various shapes).
Option one.
Management. 5-6 children take part in the game. The teacher and the children look at the picture and ask them to name the object that is depicted in this picture. Then he offers pictures with a contour image of the same object, cut into two parts. The children’s attention is drawn to the number of parts and the nature of the cut: “Look, guys, this picture is cut into two parts. These parts are rectangular in shape. The picture is cut so that it turns out to be two rectangles. If these cut parts are attached tightly to each other, you will get the same teapot as shown in the whole picture,” says the teacher and shows how to attach the cut parts so that the contour lines of the image of the object coincide. Then several children take turns adding up the pictures, and the rest evaluate the completion of the task. If the children correctly fold the cut pieces, they are offered pictures cut into four parts. The teacher draws the children's attention to the fact that when cut into four parts, squares are obtained.
Option two.
Management. The teacher shows the children a drawing of a teapot and asks what parts the teapot ; shows these parts (body, spout, handle, cut out of thick paper, and invites one child to come to the table and make a teapot . The child sequentially selects the body, spout, handle and puts all the parts together. When the teapot is made , the teacher offers to compare it with the sample and note whether all the parts are connected correctly, gives additional instructions: “Look carefully at the drawing. How are the parts attached to the body, on which side?” Children take turns performing the task.
Option three.
Management. “Children, a large, beautiful teapot stood on the edge of the table , and the girl Masha accidentally touched it. He fell and was broken. Look at the fragments that came out,” the teacher says. “You and I need to make a whole teapot .” Watch how I will glue the teapot . First, let's glue , connect these large fragments, then the spout, handle, and lid. The teapot is glued together !” When composing the fragments, the teacher draws the children’s attention to the sample and shows how to connect the fragments. If there is difficulty, he offers to indicate in words the location of the fragments.
Duration and repetition. The game ends when the child puts together a picture from parts according to the drawing. The game is repeated until complete mastery of the actions. The transition from one option to another is possible only after mastering the previous one.