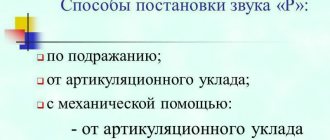
Indications for massage with a speech therapy probe
A speech therapy probe is a device with which a speech therapist exerts a mechanical effect on the baby’s articulatory organs in order to develop speech skills and restore correct sound pronunciation.
Probe massage is carried out in cases where simpler (articulatory, respiratory, imitative, transitional) methods cannot correct the child’s incorrect pronunciation. In addition, the use of speech therapy probes is considered mandatory for the following speech disorders:
- dysarthria – associated with problems of the central nervous system;
- alalia – occurs due to damage to the areas of the cerebral hemispheres responsible for speech;
- rhinolalia - manifests itself due to obvious defects in the oral or nasal cavity - this includes nasal pronunciation;
- dyslalia – not associated with hearing impairment or central nervous system problems. It is present in physiological form in every person at a certain stage of development (up to 5 years);
- stuttering;
- aphasia – problems with speech after a stroke (for adults).
Massage procedures will also be useful for general delays in speech and mental development, increased or decreased tone of the speech muscles, and cerebral palsy.
“Techniques for working with speech therapy probes”
Master class “Techniques for working with speech therapy probes”
Sound setting [s]
1.In case of labiodental sigmatism, labial articulation must be removed. This can be achieved by demonstrating the correct position of the lips when articulating this sound or with mechanical assistance (spatula, finger or probe No. 1, No. 2, No. 4) to move the lower lip away from the teeth.
2. Sound [s] from the syllable ta. The child is asked to pronounce the syllable ta repeatedly, insert umbrella No. 2 between the alveoli and the tip of the tongue (as well as the front part of the back of the tongue) and lightly press it down. A round gap is formed, passing through which the exhaled stream of air produces a whistling noise. By controlling the probe, you can change the size of the gap until the desired acoustic effect is obtained.
3. If, when pronouncing the sound [s], the tip of the child’s tongue rests on the upper teeth, a thin round stick (like a lollipop) is placed across the mouth between the incisors and fangs and the tip of the tongue is slipped under it, a free passage for air is formed between the teeth. When pronounced, normal sounds [s] and [z] are produced. Often this technique also helps in cases of whispering. Instead of a stick, you can use probe No. 4 or place a ball probe across it.
4. If instead of [s] the result is “squelching” (hl, lkh), to correct this deficiency the child is asked to stick out his widely spread, tense tongue with a “spatula” between the teeth and in this position pronounce (albeit with a lisp) [s] and [z ] in syllables and words. After mastering such a sound, the tip of the tongue gradually, day after day, is pulled back behind the lower teeth to a normal position, which is fixed by exercises. Sometimes the back of the tongue can be lowered by pressing on it with the handle of a teaspoon, a spatula or a No. 4 probe.
5. When a child replaces the sounds [s], [z] with the sounds [f], [v], the lower lip is pulled down with a finger (probes No. 2 and No. 4 can be used).
Sound setting [ts]
The sound [ts] is placed from the sound [t] with the tip of the tongue lowered to the lower incisors and the front part of the back of the tongue pressed against the upper incisors. The child pronounces the sound [t] with a strong exhalation. At the same time, he quickly and consistently said two sounds: [t], then [s]. To get a merged sound with a shortened whistling element, the child is asked to pronounce the reverse syllable with the vowel [a]. When pronounced, the combination ats is heard. In the case when it is difficult for a child to hold the tip of his tongue against the lower incisors, mechanical assistance is used: with a spatula or probe No. 1, the tip of his tongue is held against the lower incisors, or a probe is placed between the front part of the back of the tongue and the teeth, and the child is asked to pronounce the syllable ta with a strong exhalation. . At the moment the child pronounces the explosive element of the syllable, the speech therapist lightly presses the tongue. A continuous sound [ts] is heard.
Sound setting [h]
The sound [h] can be made from the soft [th], pronounced in the direct syllable tya or the reverse at. The child pronounces one of these syllables several times with some increased exhalation on the consonant element. At the moment of pronouncing, using a spatula or probe No. 5, the speech therapist slightly moves the tip of the tongue back (as for articulating the sound [sch]). The same acoustic effect can be obtained by inserting a probe under the tongue. At the moment of pronunciation, the speech therapist slightly lifts the tongue and at the same time moves it back slightly. The sound [h] is easier to produce in reverse syllables.
Sound setting [w]
The child is asked to pronounce the syllable sa several times, and the speech therapist inserts probe No. 5 under the tongue. With its help, it moves the tip of the tongue to the upper position and regulates the degree of its rise until a normal-sounding [w] appears. The speech therapist fixes the probe in this position, asks the child to pronounce the same syllable again and listen carefully. After several trainings in pronouncing sha with the help of a probe, the speech therapist fixes the child’s attention on the position of the tongue and finds out whether he can independently put the tongue in the desired position.
If the pronunciation of [r] is not disturbed, you can add the sounds [w] and [zh] from this sound. The child pronounces the syllable ra and at this moment the speech therapist touches the lower surface of his tongue with a spatula or probe No. 5 to slow down the vibration. When pronounced in a whisper, ra is heard as sha, and when pronounced loudly, zha is heard.
Sound staging [u]
The sound [ш] is placed from the sound [s]. The child pronounces the syllable sya or sya with a drawn-out whistling element: ssyi... Then the speech therapist inserts a spatula or probe under the tongue and, at the moment of pronouncing the syllables, slightly lifts it and moves it back a little. The same acoustic effect can be achieved without lifting the tongue, but only by moving it back slightly with the touch of a spatula or probe.
Sound setting [r]
1. Setting the sound [p] from [zh]. A ball probe is inserted under the tongue and, touching the lower surface of the front part of the tongue, rapid movements of the probe to the right and left cause vibrations of the tongue, its front edges alternately close and open with the alveoli. These movements can be carried out with a regular flat spatula (wooden or plastic) or probe No. 1. A child can carry out home training using the handle of a teaspoon, a cotton swab or a clean index finger.
2. Setting the sound [p] from the syllable for (zzza). At the moment of repeated repetition of syllables, the child, according to the instructions of the speech therapist, moves the front part of the tongue up and forward until the acoustic effect of the fricative [r] is obtained in combination with the vowel [a]. After this, probe No. 1 or a ball probe is inserted, and with its help, rapid movements are made from left to right and from right to left. At the moment of vibration, a fairly clear sound [p] is heard, of normal length, without excessive reverberation. With this method of sound production, no special introduction of sound in combination with a vowel is required, because a syllable immediately appears. In subsequent work, it is important to conduct training in evoking the syllables ra, ru, ry.
3. The most common technique is setting [p] from [d] and
[t], repeated on one exhalation: ttt, ttt, ddd, ddd, followed by a more forced pronunciation of the latter. Alternating pronunciation of the sounds [t] and [d] in combinations td, td or tdd, tdd at a fast pace, rhythmically is also used. They are articulated when the mouth is slightly open and when the tongue is closed not with the incisors, but with the gums of the upper incisors or alveoli. When repeatedly pronouncing a series of sounds [t] and [d], the child is asked to blow strongly on the tip of the tongue, and at this moment vibration occurs; if that doesn’t work, we move the probe left and right under the tongue while quickly pronouncing ttt or ddd. When producing a soft sound [рь], the same probes are used. First they put the unvoiced sound [r], then the voiced one.
Sound setting [l]
They often use a soft [l] as a base sound, ask the child to repeat the syllable la several times, then insert probe No. 4 so that it ends up between the hard palate and the middle part of the back of the tongue; Press the probe down on the tongue to the right or left and ask the child to say the combination A several times. At the moment of pronunciation, adjust the movement of the probe until the acoustic effect of a solid sound [l] is obtained.
Instead of a probe, you can use a thin ribbon or string; during pronunciation, pull the ribbon down to the left and right until you get a solid sound [l].
In cases where the lateral edges of the tongue are tightly pressed to the teeth, resulting in the sound [d] instead of [l] (dapa, dob), a ribbon is thrown across the tongue, away from its tip. Slightly pulling the ends down and back to form side slits, pull the middle part of the tongue away from the side teeth and from the palate and pronounce the sound [l].
For other distortions, the narrow tip of the tongue should be pressed to the upper lip and the resulting drawn-out sounds similar to [l] should be made, then with a spatula or probe No. 5 or No. 6, carefully move the tip of the tongue to the upper gum (the child makes the sound all the time).
You can offer to chant the sound [a] and, at the same time, without interrupting the voice, repeatedly and rhythmically raise and lower the narrow tip of the tongue towards the upper and lower gums. At the moment of touching the gums, the sound [l] (a-la-la-la) is heard, which is reinforced by the speech therapist or teacher, who “sings along” this sound to the child.
Sound setting [th]
The sound [th] is placed from the soft sound [z]. The child pronounces the syllable zya (zya), repeating it several times. During pronunciation, the speech therapist presses the front of the tongue with a spatula and moves it back a little until the desired sound is obtained.
Making sounds [g], [e], [x]
The child pronounces the syllable ta, and at the moment of pronouncing, the speech therapist gradually moves the tongue back with a spatula by pressing on the front part of the back of the tongue. As the tongue moves deeper, the syllable cha is heard first, then kya, and then ka. The sound [g] is also placed from the syllable yes, but it can also be obtained by voicing [k]. The sound [x] is placed from the sound [s] using a similar technique: first, xia is heard, followed by xya and, finally, ha.
Types of probes
The author of the probes used by most speech therapists and the probe massage system is Elena Novikova. According to her methodology, 11 main types of probes are distinguished:
| Probe name | Appearance | Massage areas | Functions | Necessary techniques |
| 1.Fork | fork with two curved points | Tongue (I), soft palate (MN), lips (G), cheeks (CH), cheekbones (C) | promotes intense muscle contraction, | Tingling, tingling with pumping |
| 2.Eight | number "8" or symbol of infinity | I, S, Sh, G | drowns the muscles, makes them work actively, setting the sound “R” | Rubbing movements in place along and across |
| 3,4,5.Sleds (large, medium, small) | resemble a sleigh | I, S, MN, G, SH | stretching the frenulum under the tongue, relaxing and activating muscles | Sliding movements in different directions |
| 6.Hatchet | looks like a razor | mostly language | normalizes muscle tone, increases mobility and muscle contractility | Chopping with firm pressure (frequent, small intervals), sliding movement like a “shaving” |
| 7. Cross | cross with smoothed edges, perpendicular to the handle | I, S, Sh, G | pumping of the tongue muscles, production of the sounds K, G, X, R, Sh, Zh, Shch, Ch, Zh | Scrolling, pressing, pressing the tongue to the root, pushing back with the tongue |
| 8.Pusher | ring perpendicular to the handle | I, MN, SH, G, S | muscle activation and relaxation | Pressing, scrolling, “Spring” exercise with the tongue (to the root) |
| 9.Pliers | 2 adjacent, collapsible teardrop-shaped frames on the handles | I, Ш (inside, outside), G, S | warm-up, muscle activation | Bending, turning, rolling of tongue, cheeks |
| 10. Swan | loop on a curved leg | MN, SH, S | the most convenient probe for massaging the soft palate | Pressing, scrolling |
| 11. Bridle | Bridle, horseshoe | hypoglossal ligament | Checking the condition and tightening the hypoglossal ligament | Pull the tongue upward |
Most of the devices are used to warm up, stimulate and relax the tongue muscles. Many probes are interchangeable; usually 5-6 tools are enough for massage. In addition to the main probes, speech therapists often use the following types:
- staged (narrow elongated loop) - to form a groove when pronouncing whistling sounds;
- Koritsky spatula (an oval frame extended to its full length) - for massaging the side edges, as well as the lower part of the tongue, making hissing sounds and “P”;
- spatula - for stroking, tapping, passive gymnastics;
- ball – for performing various exercises (rolling, spinning a ball), making the sound “P”;
- hedgehog (roller with convexities) - for massaging the lips, lingual, zygomatic, chewing muscles with muscle hypotonicity and paresis of the articulatory apparatus.
Setting hissing sounds with probes No. 3 and No. 5
To produce hissing sounds, use probe No. 5. The production begins with the sound “Ш”,
which is basic for the sounds of this phonetic group.
If the child pronounces the sound “C” correctly, the speech therapist asks him to open his mouth and inserts probe No. 5
wide end part under the tongue.
Then the child is asked to bring his teeth together and pronounce the sound s-s-s...
At the moment of pronouncing the sound with the help of a probe, the tip of the tongue is moved to the upper position.
By controlling the probe, the speech therapist regulates the degree of elevation of the tongue, achieving a clear hiss. The child's attention is fixed on the position of the tongue. However, until the new articulation is established, you cannot tell the child what sound he is making. Gradually, the baby gets used to the new articulation and pronounces the sound “Ш”
independently and for a long time.
Only after this inform the child that he has learned to correctly pronounce the sound “Ш”
and automate this phoneme in syllables and words.
The sound “Zh” is placed from the sound “Sh”
by turning on the voice or using
probe No. 5
in the same way, but from the sound “3”.
If the child pronounces the sound “R” correctly ,
you can put the sounds
“SH”
and
“Zh”
from this sound.
The child is asked to pronounce the sound “R” for a long time.
At the moment the sound is pronounced, the speech therapist brings
probe No. 5
to the lower surface of the front part of the tongue and inhibits its vibration.
When pronouncing the sound “R” in a whisper, the sound “Sh” is heard,
when pronouncing it loudly,
“Zh”.
Sound "Ch"
can be obtained from the soft sound
“TH”
by asking the child to pronounce the reverse syllable at with increased exhalation
.
At the moment of pronunciation, the speech therapist, using probe No. 5, slightly lifts and moves the tip of the tongue slightly back, achieving the desired acoustic effect.
Like all affricates, the “Ch”
is more easily automated in reverse syllables.
To produce the sound "Ш"
The child is asked to pronounce the syllable as in a drawn-out manner several times
.
Then the speech therapist inserts probe No. 5 under the tongue and, at the moment of pronouncing the syllable, slightly lifts the tongue and moves it back a little.
Sometimes, to evoke the sound “Ш”,
it is simply enough to ask the child to pronounce the sound
“Ч” for a long time.
Probe No. 3 is also designed to produce hissing sounds in some cases when the child has a fairly massive, large tongue. Producing sounds with this probe greatly facilitates the work of a speech therapist. By controlling the probe, the speech therapist lifts the child’s tongue and quickly develops the articulatory patterns necessary for pronouncing hissing sounds.
The techniques for producing sounds with probe No. 3 are similar to those performed with probe No. 5.
You can work either with the end part of the probe, changing the angle of its inclination, or with its transverse part with wavy teeth.
Then the hissing sounds produced using probe No. 5 or probe No. 3 are automated and differentiated.
General recommendations for conducting
Massage with speech therapy probes is carried out in courses. Each course is designed for 8-10 sessions. It is allowed to do the procedure every day, but it is better - after 1-2 days, so as not to get muscle fatigue.
A total of 3-4 courses are carried out, with a break of 30-45 days. Sometimes one course is enough to normalize pronunciation. The duration of the session depends on:
- patient's age;
- complexity of the defect;
- child's reactions.
You need to start with 5 minutes. Then for 1-3 year old children, bring it up to 5-10 minutes, for 3-7 year olds – up to 15 minutes, for schoolchildren – up to 20-25 minutes. Each movement is done 30 times.
General recommendations for preparing for a massage should be followed:
- The room should be well ventilated, bright, clean. The atmosphere is cozy.
- It is necessary for the patient to be calm and peaceful. You should not carry out therapy if the baby is agitated, aggressive, or too depressed.
- If for any reason a child has a negative attitude towards probes, you should let him touch, look at the instruments, and play with them a little. You can say that they are magical, they teach you to speak.
- In case of an extremely negative (even hysterical) reaction, it is better to keep the sessions short – 5-10 minutes. At the same time, they begin by stroking the cheeks, lips, and tip of the tongue.
By imitation from the "sail"
Therefore, the methods of sound production depend primarily on what the child has in his assets, what he can pronounce. If there are no special problems with the bite, adenoids, or innervation, then sound production is very simple, it can be done right away in one lesson. It is enough to show the baby where he should raise his tongue; you can add sensory sensations by touching this place behind the upper teeth with a finger, probe, spoon, or let the child touch it himself.
Then run something sharp, but not traumatic, for example, a fingernail along the tip of the tongue. And say that these tips should rest in that place. Then expand the tongue slightly “like a sail” and pronounce T, if the tongue does not fall out, then this is a good sign and you can move on, ask, as it were, to “blow on a sail”, that is, try to pronounce the sound T longer, which is the average between “shhh” and “tfft.”
Advantages and disadvantages
Massage with speech therapy probes, when performed correctly, gives good results. Its positive effect on the patient’s body is expressed in the following:
- speech development, improvement of sound pronunciation;
- voice normalization;
- restoring proper breathing;
- eliminating neurological disorders, improving the functioning of the central nervous system;
- normalizing muscle tone;
Universal oral massage can also be performed on healthy children at the initial stage of speech development. This will contribute to the correct formation of speech skills.
There are few disadvantages to probe massage procedures, but you shouldn’t turn a blind eye to them:
- If done incorrectly, the child's pronunciation may deteriorate.
- Massage manipulation alone is not always enough to restore speech. You cannot ignore other recommendations of the speech therapist: taking medications, physiotherapeutic procedures, articulation exercises.
Tool handling and storage
Tools for massage procedures need to be chosen from high-quality, proven companies. Main materials are titanium or stainless steel.
An important element of preparation for massage is the processing of probes. Each set of tools is used no more than 1 time. After the patient, the probes must be processed:
- Immediately after use, wash under running water and detergent.
- Place in a bath with a sterilization solution for 30-60 minutes (Alaminol, Veltolen, ID-212, Virkon, Vapusan-2000, Lisetol LF, Septodor, Erinox and others ).
- Rinse under running water.
- Sterilize in a metal sterilizer (by boiling for 10-15 minutes from the moment the water boils) or in an autoclave (steam). Plastic probes (balls) do not withstand the sterilization process, so such instruments can only be individual.
Treated devices should be stored in a UV bactericidal chamber to avoid secondary colonization by microorganisms.
Carrying out at home
Sometimes parents, for some reason, are not able to take their child for massage treatments to a speech therapist. Then you can spend them at home. At home, to normalize pronunciation, you can do 2 types of speech therapy massage:
- faces;
- articulatory apparatus.
Speech therapy facial massage
The procedure is simple and consists of sequential massaging of certain lines:
- from the center of the forehead to the temporal region, then from the eyebrows to the hairline;
- from the corners of the lips to the temporal region, then back;
- from the tip, middle of the nose, bridge of the nose - to the base of the wings of the nose;
- along the nasolabial fold from the wings of the nose;
- from the center to the corners of the lower and upper lips;
- from the center to the earlobes;
- from the sternum along the neck to the chin to the earlobes, back along the shoulder line.
Movements along all lines are stroking, rubbing, vibrating. The exception is the nasolabial fold and the last final stage from the sternum to the chin - here the movements will only be stroking.
Speech therapy massage of the speech apparatus
Massaging the organs of the oral cavity has a strong effect on the articulatory apparatus and many other systems of the body. Before doing it at home, you need to consult with a speech therapist so that he can identify the problem and suggest ways to solve it. It is also advisable to spend the first few sessions with a specialist, and then begin independent therapy.
Massage tools can be professional or taken from the everyday environment. If it is not possible to purchase speech therapy probes, you can use your fingers, a teaspoon, a toothbrush, or cotton swabs.
Before the procedure, it is recommended to warm up the tongue: swaying from side to side, licking lips clockwise, clicking (horse), pricking the cheek with the tongue and other exercises.
Conditions:
- The massage therapist's hands must be clean, without damage, and nails must be trimmed.
- Instruments are washed and disinfected.
- The child is placed on a massage table or on a hard mattress so that he is comfortable. You can also sit him on a chair with a high headrest.
- Place a clean towel or gauze under the chin and on the chest.
- Gauze is placed under the tongue to absorb excess salivary secretions.
- The tip of the tongue can be wrapped with gauze or a cloth napkin - this makes it easier to hold it so that it does not slip.
The process of universal speech therapy massage at home:
- Grab the tip of your tongue and move it left and right, up and down. Then it is pressed to the root and pulled back.
- Use your thumb to stroke the organ from the center to the edges, then make circular movements.
- Stroke your tongue from above and below. You can do this with the smooth side of a spoon.
- Make zigzag movements along.
- Perform various vibration movements: rocking, rubbing, tapping.
- Using a toothbrush, apply pressure and rocking pressure on the tongue.
- Massage the frenulum by moving your thumb or the convex side of the spoon upward.
- Massage the surface of the tongue with a rough cloth or soft toothbrush.
You can also gently massage the inside of your cheeks and lips.
Remember:
- If it is difficult for a child to relax his tongue, then an adult can do this himself by shaking the articulatory organ.
- With hypertonicity, all movements should be weaker and calmer. The direction when moving along the tongue is from the root to the tip.
- With hypotonicity, movements are more active and strong. The direction along the tongue is from tip to root.
It is easy to determine the tone of the articulatory apparatus:
- with increased or hypertonicity, the tongue is compressed like a sausage, too tense;
- with decreased or hypotonicity, the organ, on the contrary, is too relaxed and cannot maintain the same position for a long time.
Ilyakova N.E. Staging probes in the correction of sound pronunciation. A book on the topic
Ilyakova N.E. Staging probes in the correction of sound pronunciation: a manual for speech therapists in preschool, school and medical institutions / M.: Publishing House GNOM i D, 2005. - 24 p.
Introduction
One of the main areas of speech therapy is the correction of sound pronunciation.
Sound production for any type of speech disorder is achieved by using a number of special techniques described in detail in the specialized literature. Traditionally, there are three methods:
- by imitation (the so-called imitative method, when a child, relying on verbal instructions, the speech therapist’s demonstration and his own acoustic, visual, tactile and muscle sensations, consciously tries to reproduce the articulation necessary for the correct pronunciation of a particular sound);
- with mechanical assistance (based on external mechanical influence on the articulation organs with fingers, spatulas or specially designed probes; based on some initial articulation with mechanical assistance, the child’s speech organs are passively brought to the required position);
- mixed (based on the combination of the two previous methods; in this case, speech therapy probes perform an auxiliary function to develop more accurate and complete articulatory movements). A set of positioned wire probes is offered to the attention of speech therapists. Mechanical action significantly speeds up the process of producing sounds. Especially in children who cannot reproduce some precise movements with a speech therapist (for example: the child cannot independently hold the tongue at the lower incisors; raise the front part of the tongue to the upper teeth or onto the upper lip). Gradually, the articulatory structure obtained with mechanical assistance is consolidated, and the child reproduces it independently.
Before carrying out correction work, it is necessary to conduct a thorough speech therapy examination of the structure and mobility of the child’s articulatory apparatus and assess the state of phonemic hearing.
In cases of severe impairment of sound pronunciation, a speech therapist may need to conduct a course of massage of the organs of the articulatory apparatus with the fingers (E.A. Dyakova. Speech therapy massage). And only after that work on producing sounds with mechanical assistance.
Description of staging probes
The proposed set consists of 6 specially designed wire probes, each of which is designed to exert a mechanical effect on the organs of articulation in order to obtain the correct articulatory pattern for pronouncing a sound from a particular phonetic group.
The probes are made of stainless medical steel. After appropriate disinfection treatment (boil in an autoclave or heat-treat in an oven), the probes are ready for use.
Probe No. 1
Designed to produce whistling sounds in cases where the child cannot independently form a groove along the midline of the tongue (with lateral, nasal and labial-dental pronunciation of whistling sounds).
In some cases, probe #1 can be used to produce the "P" sound.
Probe No. 2
They are used to produce whistling sounds when they are pronounced laterally or in teeth, complicated by malocclusions.
Probe No. 3
It is used to produce hissing sounds with nasal, labial-dental or whistling pronunciation. Working with it is especially effective when the child has a large (massive) and clumsy tongue.
Probe No. 4
It is used to produce whistling sounds in case of dental sigmatism and to produce the sounds “L”, “L”.
Probe No. 5
It is used to produce hissing sounds.
Probe No. 6
Ball probe. Used to make the sounds “P”, “Рь”.
Stages of sound pronunciation correction
The main goal of speech therapy for various speech disorders (dyslalia, dysarthria, rhinolalia, etc.) is the formation of various skills and abilities to correctly reproduce speech sounds. To do this, the child must be taught:
- recognize and distinguish between speech sounds (phonemes);
- distinguish between correct and defective pronunciation of sounds;
- exercise auditory and speech motor control over one’s own pronunciation of sounds;
- take the correct articulatory positions necessary for the normal reproduction of sounds in speech;
- accurately use the given sounds in independent coherent speech.
The key to success with speech therapy is the creation of favorable conditions for overcoming pronunciation deficiencies: close emotional contact between the speech therapist and the child, an interesting form of organizing classes and a varied combination of special working techniques to avoid fatigue.
Speech therapy for correcting pronunciation is carried out in stages. At each stage, a specific pedagogical task is solved. Traditionally, there are three main stages in speech therapy:
1. Preparatory stage
The main tasks of this stage:
a) general pedagogical: establishing a trusting relationship between the speech therapist and the child and targeted preparation for classes (development of voluntary attention, memory, thinking);
b) correctional: development of phonemic hearing, speech breathing, fine and articulatory motor skills. At this stage, the formation of stable articulatory skills is especially important: mastery of basic articulatory movements of sufficient strength, smooth, precise and clear execution, the ability to hold a position and smooth switchability of movements . The speech therapist works out the necessary articulatory movements for the child in individual lessons (no more than 1-2 movements per lesson). Then the practiced exercises are included in systematic articulation gymnastics conducted by a speech therapist, teachers and parents (no more than 3-5 minutes in time). It is advisable to combine a complex of articulatory gymnastics with breathing and vocal exercises, as well as exercises for the development of fine motor skills and phonemic perception. At the preparatory stage, it is also important to practice a clear pronunciation of the reference (for each phonetic group) sound, similar to the disturbed one in place or method of formation. For whistling sounds these are sounds i, f. For hissing sounds, these are the sounds yew. For the sound “L” - t, s; for “R” - d and g.
2. Stage of formation of primary pronunciation skills
At this stage, the production, automation and differentiation of defectively pronounced sounds takes place on speech material specially selected by the speech therapist (syllables, words, phrases, simple poetic and prose texts).
3. Stage of formation of communication skills
The goal of this stage is the correct use of sounds in free speech communication, in various external situations, as well as in spontaneous speech.
At this stage, the correct pronunciation of all sounds in the child’s coherent speech is further consolidated on more complex text material, including works of oral folk art and fiction.
Thus, the use of staging probes in the correction of defective pronunciation requires serious preparatory work prior to mechanical action. First of all, this is the development of speech breathing (slow deep inhalation and long exhalation) and the development of sufficient mobility of the muscles of the articulatory apparatus as a whole. All this is the basic basis that prepares the child’s speech apparatus to pronounce sounds from any phonetic group.
Exercises to develop speech breathing
The exercises are performed in a free pose while standing, sitting or lying down. The speech therapist should ensure that the child is relaxed, does not raise his shoulders and does not unnecessarily strain the muscles of the respiratory apparatus. When performing breathing exercises, the mouth should be slightly open; accompanying movements of the organs of the articulatory apparatus are unacceptable. The inhalation is deep and slow, and the exhalation is smooth and long. All breathing exercises are aimed at developing a long, directed air stream running along the midline of the tongue. Each exercise is performed 5 times.
Exercises aimed at developing speech breathing, according to their purpose, are divided into exercises that develop:
a) a cold air stream directed downwards;
b) a warm air stream directed upward.
Exercises that produce a cold air stream are performed with the mouth slightly open and a wide soft tongue hanging out - a “scapula”, lying on the lower lip. In this position, the sound f-f-f is pronounced for a long time on one exhalation...
1. “Let’s blow on the plumes.” At the signal from the speech therapist, blow forcefully on the plumes (small figures made of thin paper attached with threads to sticks or strips of cardboard, for example: “leaves on a branch,” “butterflies,” etc.) so that they move and rustle.
2. “Let’s blow out the candle.” At the “Quiet Breeze” signal, slowly blow on the flame so that it deflects but does not go out. At the signal “Strong wind”, try to blow out the candle with one exhalation.
3. "Fast ball." The child is asked to blow strongly (with one exhalation) forward onto a cotton ball lying on the table.
4. “Let’s put the ball in the goal.” The exercise is performed in a similar way, but the child must “score a goal” into a goal built on a table from two objects (cubes, etc.). The speech therapist gradually reduces the distance between the “bars”.
As the child masters these exercises, the tongue is retracted behind the lower teeth, and then the exercises are practiced with lips stretched into a smile, loosely closed.
The production of a warm air stream directed upward is carried out with the mouth wide open. The tongue in the shape of a “cup” is raised up, the side edges of the “cup” are pressed against the upper molars, and the front part of the tongue forms a gap with the upper lip (in the “Focus” exercise) or with the upper teeth (in the “Warm Palms” exercise). A long, strong exhalation produces a warm, directed air stream.
1. "Focus". Place a small piece of cotton wool on the tip of the nose. The child should raise his tongue to his upper lip and exhale forcefully onto the cotton wool. It should fly vertically upward.
2. “Let’s warm our palms.” The child freely, without straining, holds his arms in front of him, bent at the elbows, with his palms facing him. The tongue is cupped in the mouth near the upper teeth. The mouth is open. In this position, the child, with a strong exhalation, “warms his palms” (x-x-x...).
Exercises that develop articulatory motor skills
Clear and correct execution of articulatory exercises, worked out sequentially with the child and then included in daily 3-5 minute articulatory gymnastics, is an indispensable condition for the formation of high-quality articulatory motor skills, and therefore phonetically pure, correct pronunciation of sounds.
The speech therapist selects exercises for each child individually, taking into account the speech defect and structural features of the articulation organs.
Articulation exercises are shown and performed first with visual control (in front of a mirror) as shown by the speech therapist, and as they are learned, according to verbal instructions without visual control, relying on the kinesthetic sensations of the child himself. (Visual control is not used for dysarthrics).
Lip exercises
The exercises are performed slowly and clearly. The lips are held in a given position for a count of ten.
1. “The clown is making a face.” Keeping your lips in a smile. The teeth are not visible.
2. “Smile” (“Fence”). Keeping your lips in a smile. The upper and lower front teeth are closed and exposed.
3. “Tube”. Pulling the lips forward with a tube. The teeth are open.
4. "Bagel". The lips are rounded and slightly pushed forward. The teeth are closed.
For good switchability of movements, alternate performing exercises for the lips (“Smile” - “Tube”, “Smile” - “Donut”), changing the order.
Articulation exercises for the tongue are conventionally divided into static and dynamic.
Static exercises for the tongue
They are performed with an open mouth (lips in a smile, front teeth visible) and a motionless lower jaw. Each exercise is performed clearly, slowly 8-10 times. Hold the position for a count of five to ten. When performing any exercise, you must ensure that the child does not make additional movements with his lips or lower jaw.
1. "Spatula". Stick a wide, soft, relaxed tongue out of your mouth and place it on your lower lip (the side edges of the tongue touch the corners of your lips).
2. "Needle". Stick your tongue out of your mouth forward and tense - make it narrow.
3. "Calyx". Stick out a wide, soft, relaxed tongue from the mouth, lift it to the upper lip (upper teeth), without touching them, bend the middle part of the tongue, while simultaneously bending the side edges up.
4. “Pussy is angry.” Place the tip of your tongue on the lower incisors. Press the lateral edges of the tongue against the upper molars, arching the back of the tongue up and forward.
5. "Groove". Stick out your wide tongue. Fold the lateral edges of the tongue upward. Helping with your lips, hold the resulting groove.
Dynamic exercises for the tongue
By practicing the dynamic exercises presented below, the speech therapist ensures that the child performs movements accurately, smoothly, fully in volume, and rhythmically.
The exercises are performed with the mouth wide open and the lower jaw motionless. Concomitant movements of the lower jaw and lips are not allowed. Each exercise is performed clearly, slowly, at the count of the speech therapist, 10-15 times.
To develop good switchability of movements, first alternate the “Shovel” exercise with other static exercises (“Shovel” - “Needle”; “Spatula” - “Cup”, etc.). Then do the following exercises.
1. “Let’s punish the naughty tongue.” Stick your wide tongue out of your mouth and place it on your lower lip. While spanking it with your lips, pronounce the combination of five-five-five... Stop and hold your wide tongue in a calm position.
2. “Let’s brush our teeth.” Using the tip of your tongue, “clean” the upper or lower teeth from the inside, first moving your tongue from side to side; then up and down.
3. "Watch". Stick your narrow tongue out of your mouth and stretch it alternately - first to the right, then to the left ear. Alternate movements rhythmically.
4. "Swing". Stick your narrow tongue out of your mouth. Alternately reach for it - first to the nose, then to the chin.
5. "Horse". Suck your tongue to the roof of your mouth, stretching the hypoglossal ligament. Click your tongue, slowly and forcefully.
6. "Accordion". It is performed as the previous exercise, but the tongue does not come off the palate, only the lower jaw rises and falls (“play the harmonica”).
7. “Snake”. Make the tongue narrow (tighten). Push the narrow tongue forward as much as possible and then retract it deep into the mouth.
8. “Delicious jam.” Raise your wide tongue up. Lick your upper lip, making back-and-forth movements.
9. "Turkeys." Using the wide front edge of the tongue, make rhythmic movements back and forth along the upper lip, pronouncing the sound combinations bl-bl-bl with your voice... Gradually speed up the pace.
10. "Painter". Using the wide tip of the tongue, like a brush, “paint” the hard and soft palate, making movements back and forth (from the tubercle behind the upper teeth to the neck).
Techniques for producing individual sounds
It is customary to arrange and automate the sounds of any phonetic group sequentially. In the whistling group, the unvoiced sound “C” is first placed, and at its base - the voiced sound “3”. Hard sounds are practiced sequentially, then soft sounds and the sound “C”. When making hissing sounds, the sound “Sh” is first put, then the sounds “Zh”, “Ch” and “Sh”. When setting sounds from a group of sonors (“P” - “Pb”, “L” - “L”), the hard sound of each pair is first placed, and then the soft one. However, this sequence is not rigid. The speech therapist determines the sequence of production of each group of sounds based on both the nature of the speech disorder and the individual characteristics of the child.
Sound production using one or another probe is carried out as follows. The speech therapist sits the child on a high chair facing him. Shows him the probes, lets him hold them in his hands and explains what they are for. The child should not have a feeling of fear. You can even come up with and tell a story about these “magical helpers.” And only after this the sounds are produced.
Sometimes sound production using probes is carried out with the child lying down (for additional relaxation of the muscles of the articulatory apparatus).
The use of sound probes is strictly individual. Before sounding, the appropriate sanitary and hygienic treatment of the probes must be carried out.
Setting whistling sounds with probes No. 1, No. 2 and No. 4
For lateral and nasal pronunciation of whistling sounds, when it is not possible to obtain a groove along the midline of the tongue, probe No. 1 is used.
First, using a probe, a groove is formed with the tongue protruding from the mouth. The child is asked to blow into the groove formed in the tongue and then this skill is reinforced, gradually eliminating mechanical assistance.
To make the sound “C”, the speech therapist invites the child, without sticking out his tongue, to open his mouth and smile. Then he places the probe on the front of the tongue in the middle, holding the tip of the tongue with the base of the loop of the probe against the lower teeth. In this position, the child is asked to blow on the tip of his tongue. At the same time, the speech therapist lightly presses the probe on the tongue, forming a groove for escaping air and achieving the desired acoustic effect. After a series of training in pronouncing the sound “C” with probe No. 1, the child is able to reproduce the necessary articulatory pattern and correctly pronounce the sound without mechanical assistance. Then the sound is automated based on the speech material selected by the speech therapist.
The sound “3” is placed in a similar way, but with the involvement of the vocal cords.
To eliminate interdental and subdental sigmatism, especially complicated by malocclusion, probes No. 2 and No. 4 are used. The sound is made from defective pronunciation. The child is asked to pronounce the sound s-s-s for a long time... At this time, the speech therapist, pressing on the tip of the tongue with the loop of probe No. 2 or probe No. 4 placed across the mouth in front of the lower fangs, slightly moves the tongue away from the lower teeth deeper into the mouth. A gap is formed, necessary to reproduce the whistling noise. Gradually, the mechanical assistance is eliminated, and the child can independently pronounce the sound.
The sound “Ts” can be obtained using probes No. 1 and No. 2 in two ways.
The child is asked to pronounce the sound combinations ts-ts-ts... Simultaneously with the pronunciation, the speech therapist holds the tip of the tongue with probe No. 1 or No. 2 at the lower incisors (according to F.F. Pay).
Pressing the tip of the tongue against the lower teeth, for a long time in a soft attack the child is asked to pronounce the sound s-s-s... At the same time, the speech therapist presses the tip of the tongue with probe No. 1 or No. 2, slightly moving it deeper into the mouth (according to O.V. Pravdina). By controlling the probe, the speech therapist achieves clear pronunciation of the sound.
Soft sounds are set from hard base sounds. The whistling sounds produced using probes No. 1, No. 2 and No. 4 are automated and differentiated.
Setting hissing sounds with probes No. 3 and No. 5
To produce hissing sounds, use probe No. 5. The production begins with the sound “Ш”, which is basic for the sounds of this phonetic group.
If the child pronounces the sound “C” correctly, the speech therapist asks him to open his mouth and inserts probe No. 5 with the wide end part under the tongue. Then the child is asked to bring his teeth together and pronounce the sound s-s-s... At the moment of pronouncing the sound with the help of a probe, the tip of the tongue is moved to the upper position. By controlling the probe, the speech therapist regulates the degree of elevation of the tongue, achieving a clear hiss. The child's attention is fixed on the position of the tongue. However, until the new articulation is established, you cannot tell the child what sound he is making. Gradually, the baby gets used to the new articulation and pronounces the sound “Ш” independently and for a long time. Only after this inform the child that he has learned to correctly pronounce the sound “Ш” and automate this phoneme in syllables and words.
The sound “Zh” is placed from the sound “Sh” by turning on the voice or using probe No. 5 in a similar way, but from the sound “3”.
If the child pronounces the sound “R” correctly, you can add the sounds “Sh” and “F” from this sound. The child is asked to pronounce the sound “R” for a long time. At the moment the sound is pronounced, the speech therapist brings probe No. 5 to the lower surface of the front part of the tongue and inhibits its vibration. When pronouncing the sound “R” in a whisper, the sound “Sh” is heard, when pronouncing it loudly, “Zh”.
The sound “CH” can be obtained from the soft sound “T” by asking the child to pronounce the reverse syllable at with increased exhalation. At the moment of pronunciation, the speech therapist, using probe No. 5, slightly lifts and moves the tip of the tongue slightly back, achieving the desired acoustic effect. Like all affricates, the “Ch” sound is more easily automated in reverse syllables.
To make the sound “Ш”, the child is asked to pronounce the syllable as in a drawn-out manner several times. Then the speech therapist inserts probe No. 5 under the tongue and, at the moment of pronouncing the syllable, slightly lifts the tongue and moves it back a little. Sometimes, to evoke the sound “Ш”, it is simply enough to ask the child to pronounce the sound “Ч” for a long time.
Probe No. 3 is also designed to produce hissing sounds in some cases when the child has a fairly massive, large tongue. Producing sounds with this probe greatly facilitates the work of a speech therapist. By controlling the probe, the speech therapist lifts the child’s tongue and quickly develops the articulatory patterns necessary for pronouncing hissing sounds.
The techniques for producing sounds with probe No. 3 are similar to those performed with probe No. 5.
You can work either with the end part of the probe, changing the angle of its inclination, or with its transverse part with wavy teeth.
Then the hissing sounds produced using probe No. 5 or probe No. 3 are automated and differentiated.
Production of sonorous sounds with probes No. 1, No. 4 and No. 6
To produce the sound “L” in cases where the child finds it difficult to form lateral gaps between the tongue and teeth (for example, with paralambdacism - replacing the sound “L” with the sound “N”), use probe No. 4. The child is asked to open his mouth slightly. The speech therapist inserts the probe, places it with the end part across the tongue and presses the lateral edges of the tongue. Then he asks the child to lift and press the tip of his tongue at the tubercle behind the upper teeth (near the alveoli). Smile and in this position pronounce the sound a, s, or the combination ya. At the moment of pronunciation, a sound close to “L” will be heard, because a stream of exhaled air passes into the gaps formed with the help of a probe between the lateral edges of the tongue and the upper molars, and the lips, especially when positioned from the sound “Y”, occupy a position that fully corresponds to the articulatory posture of the sound “L”. However, until the articulatory posture of the sound “L” is completely consolidated, the child’s attention is fixed only on the position of the lips and tongue, and not on the pronounced sound.
If the child pronounces the sound “L” correctly, you can ask him to pronounce the syllable “A” several times, then insert probe No. 4 and fix it so that it is located between the hard palate and the middle part of the back of the tongue. The speech therapist again asks the child to pronounce the syllable la and at the same time presses the probe on the middle part of the tongue, achieving the acoustic effect of the hard sound “L” in the syllable la.
With the same probe you can make the sound “L” from the sound “L”. When pronouncing the sound “L” in a drawn-out manner, slightly arching the back of the tongue upward with a probe installed on the middle part.
To produce the “P” sound, use a ball probe No. 6. Traditionally, the production of the “P” sound is carried out in two stages. First, the fricative sound “P” is placed without vibration from the drawn-out sound “Zh” without rounding the lips and moving the tip of the tongue as close as possible to the upper teeth (alveoli). At the same time, a minimal gap is maintained between the tip of the tongue and the gums. The sound should be pronounced with strong air pressure. Then they move on to the second stage of production. The child is asked to pronounce the resulting fricative sound forcefully. At the same time, the speech therapist inserts probe No. 6 under the lower surface of the front part of the tongue and makes quick rhythmic movements from side to side, swinging the tongue.
In some cases, probe No. 1 can be used to evoke the sound “P”. After setting the fricative (without vibration) sound “P” from the sound “Zh”, when pronouncing it for a long time with strong air pressure, probe No. 1 is inserted under the lower surface of the front part of the tongue and, making quick movements from side to side, cause vibrations of the tongue. The child can do home workouts independently using the handle of a teaspoon or a clean index finger.
The production of the sound “R” can be done with mechanical assistance and by pronouncing on one exhalation the repeatedly repeated sound “D”: ddddd... or a combination of sounds j-j-j... In this case, it is necessary to ensure that the exhaled stream of air is strong.
The sounds of other phonetic groups can also be recalled using these probes. The effectiveness of a particular probe is determined by a speech therapist for each individual case of pronunciation disorder.
The process of sound production will be more effective if the speech therapist uses such auxiliary gaming techniques as imitation of surrounding noises (car engine, airplane engine, tiger growl, etc.).
Literature
Bogomolova A.I. Speech therapy manual for classes with children. – St. Petersburg: Bibliopolis, 1994.
Volkova L.S. and others. Speech therapy. - M.: Education, Vlados, 1995.
Dyakova E.A. Speech therapy massage. - M.: Publishing House, 2003.
Efimenkova L.N. Correction of speech sounds in children. - M.: Education, 1987.
Konovalenko V.V., Konovalenko S.V. Individual and subgroup work on correcting sound pronunciation. - M.: “Gnome-Press”, “New School”, 1998.
Lalaeva R.I. Speech therapy work in correctional classes. - M.: Vlados, 1999.
Levina R.E. Fundamentals of the theory and practice of speech therapy. - M.: Education, 1968.
Novikova E.V. Probe massage: correction of sound pronunciation. - M.: GNOM and D, 2004.
Pay F.F. techniques for correcting deficiencies in the pronunciation of phonemes. / Fundamentals of the theory and practice of speech therapy. - M.: Education, 1968.
Fomicheva M.F. Teaching children correct pronunciation. - M.: Education, 1989.
Khvattsev M.E. Speech therapy. - M.: Education, 1951.
Tips for parents
In order for speech therapy probe or home massage to bring benefits and only positive emotions to the child, parents should follow these tips:
- Use all the techniques recommended by the speech therapist to resolve the problem. This can be not only massage, but also speech therapy exercises, communication with a psychologist, medication treatment, and physical therapy.
- If massage procedures, despite all the efforts of the specialist, cause discomfort in the child, you need to come up with some way to encourage him to visit the speech therapy room. For example, promise to buy a toy or sweets that the baby would like to receive.
- Communicate more with your child, monitoring your pronunciation and his. Correct his mistakes, pronounce the correct pronunciation several times.
- Do articulation exercises more often.
- Play speech therapy games with your student to help eliminate pronunciation problems.
- Don’t worry if after the first or second course of procedures there are no results: the baby still speaks incorrectly. Often 3-4 courses are required to achieve the desired effect. Everything will definitely work out! The main thing is to believe in your strengths and the abilities of your child.
Related posts:
- Massage for speech development - speech therapy interventions Massage for the correction and development of speech is carried out in various ways....
- Logorhythmic classes and correctional means By various means, speech therapy classes contribute to the effective correction of speech in children...
- Rhoticism in speech - complete information Rhotacism (problem with the sound [P]) is the most common disorder in children...
- A child does not know how to say R - we’ll show you how to teach it. To teach a child to pronounce the letter R, you need to regularly perform special...