Tweet
To set the sizzling ones, you can use the handle of a teaspoon
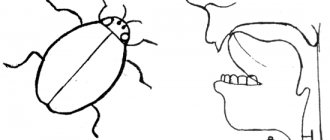
By the age of 4, a child usually pronounces hissing sounds correctly. At this age it is worth starting to stage them, if they have not yet appeared.
You can read about the correct articulation and violations of the pronunciation of hissing sounds (Ш, Ж, Ш, Ш, ) here.
In order to prepare the tongue muscles for pronouncing hissing sounds, certain articulation exercises are performed.
For lips: rounding, pulling lips forward. These are exercises like “Tube”, “Donut”.
For the tongue: Exercises for raising the tongue upward, the same as for the sound P, developing a directed air stream upward “Focus”, “Cup” with the tongue outside the mouth, in the mouth.
Preparing for the procedure.
It is necessary for the doctor to establish a trusting relationship with the patient or his relatives.
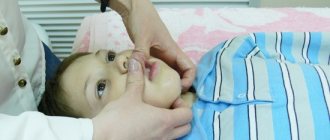
The doctor must tell the patient the purpose of the upcoming procedure and familiarize him with what food he will be given. The doctor should also tell you about the stages of the upcoming procedure. The room should be ventilated in advance. The next stage of preparation for inserting the probe is measuring the distance from the throat to the stomach. To do this, the patient must sit up straight. Then the doctor should take a measurement. There is an alternative way to calculate the distance to the stomach; to do this, you need to subtract 100 cm from the person’s height. In order for the nasogastric tube to easily enter the stomach, it is recommended to moisten it in the Furacilin solution. The solution is diluted in a ratio of 1 to 2000. The nasogastric tube is wetted to the marked mark. Next, you should put the patient on the couch. He lies down on his back. A pillow is placed under the head. It is necessary to make sure that the head is slightly tilted. This position will ensure free insertion of the probe into the nasopharynx. A napkin is placed on the patient's chest. The doctor must carry out this procedure wearing gloves.
Advantages of installing probes at home
A complication of a stroke with loss of the swallowing reflex or various injuries to the esophagus - such conditions will definitely not allow you to eat comfortably. Installing a nasogastric tube at home will completely solve the problem. Advantages of the ordered service:
- Maximum convenience. The patient will be relieved of worries, because the nurse will tell you how to tune in to the procedure in advance and how to breathe while the probe is advancing. Familiar surroundings will help you relax, and you won’t have to “shake” in public transport on the way back.
- Quality of the procedure. Services are provided only by certified nurses with extensive experience.
- Nice service. No meaningless conversations, siphoning off funds or absurd recommendations. A specialist will come to your home and do his job competently.
- Affordable prices. Installing the probe will not incur significant financial costs.
- Response speed. In Moscow there are no nurses as efficient as those from MedinHome, who get to the patient in the shortest possible time.
In order to clarify the cost of the procedure, you need to contact the dispatcher by contact number or WhatsApp.
Insertion of a nasogastric tube.
Performing the procedure:
- Wash and dry your hands. Wear gloves.
- Liberally coat the blind end of the probe with glycerin (or other water-soluble lubricant).
- Ask the patient to tilt their head back slightly.
- Insert the probe through the lower nasal passage to a distance of 15-18 cm and ask the patient to tilt his head forward.
- Advance the probe into the pharynx along the back wall, asking the patient to swallow if possible.
- Immediately, as soon as the probe is swallowed, make sure that the patient can speak and breathe freely, and then gently advance the probe to the desired level.
If the patient can swallow:- Give the patient a glass of water and a drinking straw. Ask to drink in small sips, swallowing the probe. You can add a piece of ice to the water;
ensure that the patient can speak clearly and breathe freely;
- gently move the probe to the desired mark.
- Help the patient swallow the probe by moving it into the pharynx during each swallowing movement.
Make sure the tube is positioned correctly in the stomach:- introduce about 20 ml of air into the stomach using a Janet syringe, while listening to the epigastric region, or
attach the syringe to the probe: during aspiration, the contents of the stomach (water and gastric juice) should flow into the probe.
- If necessary, leave the probe for a long time: cut off a 10 cm long plaster, cut it in half 5 cm in length. Attach the uncut part of the adhesive plaster to the back of the nose. Wrap each cut strip of adhesive tape around the probe and secure the strips crosswise on the back of the nose, avoiding pressing on the wings of the nose.
- Cover the probe with a plug (if the procedure for which the probe was inserted will be performed later) and attach it with a safety pin to the patient's clothing on the shoulder.
How will you feel?
Slight pain in the nasal cavity, pharynx and vomiting are possible, but not all patients experience this. It is important to listen to your doctor's commands and breathe properly through your mouth. Almost all patients tolerate both this manipulation and treatment with an installed probe satisfactorily. Don't worry, nasal breathing will continue. Sometimes it takes 2-3 days to get used to the probe. In extreme cases, the doctor may prescribe painkillers, antiemetics and antispasmodics. At first, you need to listen to yourself and understand what position you should be in in order to reduce discomfort in this area. The main thing is to remain calm and remember that this is a necessary and temporary measure. According to many patients, their fears about inserting a probe were greatly exaggerated.
Feeding through a nasogastric tube.
The probe is lowered to the level of the stomach. Air should not be allowed to enter there. To do this, the funnel is tilted and filled with food. The food should be warm, its temperature should be 38-40 degrees. Once the funnel is filled with food, it is gradually raised up until the food remains only in the neck of the funnel. Next, the funnel descends again down to the level of the stomach. It is then filled with food and the process is repeated in a similar manner. After all the food has been introduced, boiled water or tea is poured into the tube.
After the introduction of food is completed and the probe is washed, a clamp must be installed on its end. Next, remove the funnel. Afterwards, wrap the end of the probe in a sterile napkin or place it in a tray, or you can fix it on the patient’s neck. Leave in this state until your next meal.
Features of nutrition through a gastrostomy tube
What is a gastrostomy?
Percutaneous gastrostomy is a special system for feeding through the anterior abdominal wall and an artificial entrance to the stomach cavity.
How is percutaneous endoscopic gastrostomy performed?
- The entire procedure is performed under anesthesia. At the first stage, esophagogastroduodenoscopy is performed to exclude pathologies of the upper gastrointestinal tract that prevent the installation of a gastrostomy tube.
- An endoscopist performing an examination of the stomach determines the most convenient place for installing a gastrostomy (the anterior wall of the lower third of the body of the stomach) and uses the endoscope to “illuminate” the place where the gastrostomy is installed on the skin.
- The assistant doctor, guided by endoscopic “illumination,” makes a small (about 7-9 mm) incision at the site of the planned installation of the gastrostomy tube and inserts a thin plastic pointed rod into the stomach.
- The rod inside has a channel through which a conductor is inserted into the lumen of the stomach. The endoscopist grabs the guidewire with forceps and, removing the endoscope, removes the thread from the stomach and esophagus into the patient’s oral cavity. The other end of the thread is held by a medical assistant.
- A gastrostomy tube is attached to the withdrawn part of the guidewire. The assistant doctor, by pulling the thread from the opposite end, ensures the movement of the gastrostomy tube through the esophagus into the stomach. In this case, the gastrostomy tube is brought to the surface of the skin and fixed to it with a plate, and the flat rubber part (cannula of the gastrostomy tube) is pressed tightly against the wall of the stomach from the inside. Thus, the anterior wall of the stomach is connected to the skin of the anterior abdominal wall, and water and nutritional mixtures can be injected directly into the lumen of the stomach through a plastic tube.
- This minimally invasive procedure lasts about one hour and is performed under constant endoscopic control in order to avoid complications.
- During the first 24 hours after the gastrostomy tube is installed, you should not administer nutritional mixtures or any other liquids through it.
How will you feel?
Minor pain is possible, which can be easily relieved with painkillers prescribed by your doctor.
Important: feeding through a gastrostomy tube can only be started after the permission of the attending physician. The amount of food and frequency of administration in the first days are discussed additionally!
How to care for a gastrostomy tube?
- Regularly change the sterile dressing placed around the incision site between the skin and the restraint. During the first week, dressings are performed daily, and then every other day. The area of skin around the stoma and the fixation device should be well dried. Every day, rotate the plastic probe 180 degrees around its axis and move it up and down 1.0-1.5 cm so that it does not stick to the walls of the stoma.
- Make sure that the external fixation disc is at least 5 mm from the surface of the skin. If you have gained or lost weight, it becomes necessary to loosen or tighten the fixation device.
- After each meal, rinse the gastrostomy tube with 20-40 ml of water. The tube must be washed every 8 hours, even if you did not administer nutritional formula through it. Clean with a damp cloth and then dry the skin around the stoma and the retainer to avoid infection. Ask your healthcare provider which skin disinfectant you should use.
- If your gastrostomy tube falls out, contact your doctor immediately.
What food can you eat?
Food can only be taken in liquid form (the consistency of cream) and without lumps, so that the tube does not become clogged. Remember that food should contain a sufficient amount of quality protein and healthy fats (butter and vegetable oil). Daily calorie content should be approximately 2000 kcal. The daily volume is divided into equal portions of 150-200-300 ml, administered every 2-3-4 hours and is approximately 2000 ml. The temperature of the food introduced should be approximately 40-45 degrees (with the exception of specialized mixtures that are consumed at room temperature).
Main courses: blended (carefully chopped) low-fat boiled vegetables, diluted with broth, meat, poultry; liquid mashed porridge with added butter.
You can use baby meat, vegetable and fruit food, diluting them to the appropriate consistency with cream or broth. Also use milk, fermented milk products, sour cream. Boiled eggs can also be crushed and added to food. You can use compotes, fruit drinks, and juices as drinks.
In our medical institution, a probe table will be prepared for you in the kitchen. If necessary, the attending physician will prescribe nutritional support in the form of ready-made specialized mixtures, and part of the daily diet can be replaced with them. You can also use your own blender and prepare the necessary mixtures yourself from the dishes offered for the common table. When taking diluted food, you do not need additional fluid intake if you are not thirsty, especially since after each meal you need to rinse the tube with 50-60 ml of warm water.
If you have a favorite food or drink (tea, coffee), then do not deny yourself the pleasure and add it to your diet.
What to eat?
You will be given two Janet syringes (150 ml), and now they will serve as utensils.
What do you need to prepare for meals?
You will need:
- the finished mixture, its temperature should be approximately 40 degrees;
- drinking water at room temperature or slightly warmer;
- 2 syringes Janet;
- 2 containers with a volume of 200 and 500 ml (glass, mug, glass);
- spoon;
- napkin;
- blender (optional, for advanced users).
Probe installation service at home in Moscow
You may need to order the installation of a nasogastric tube at home in Moscow:
- for acute pancreatitis;
- after surgery to treat intestinal obstruction;
- with injuries to the tongue, pharynx, esophagus or abdomen;
- during the rehabilitation period after partial gastrectomy;
- after suturing a perforated ulcer;
- to make eating easier for patients who suffer from nervous regulation disorders;
- with fistulas of the esophagus or its pathological narrowing.
However, the procedure also has several contraindications: ulcers in the acute phase, pathologies of the hematopoietic system (for example, hemophilia and bleeding disorders of other origins), varicose veins of the esophagus, serious injuries to the skull bones. The consultant will definitely warn you about this when clarifying the details of ordering the service.
Specialists also take into account the age characteristics of the patient - the size of the probe is selected individually. Typically, tubes ranging in length from 38 to 120 cm are required to accommodate each client's anatomical needs.
![Letter L and sound [l]](https://pleshakof.ru/wp-content/uploads/bukva-l-i-zvuk-l-330x140.jpg)