Article:
Articulation gymnastics
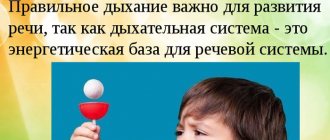
Before starting articulation gymnastics, it is advisable to perform a self-massage of the face. Regularly performing articulatory exercises will help: • Improve blood supply to the articulatory organs, • Strengthen the muscular system of the tongue, lips, cheeks • Teach the child to maintain a certain articulatory position, increase the range of movements, reduce spasticity (tension) of the articulatory organs. It is better to perform articulatory gymnastics while sitting in front of a mirror to visually control the exercises. Here we present a set of universal exercises for the lips and tongue, which are performed when the main groups of sounds are violated. Gymnastics in the structure of a speech therapy session should not take much time. At the stage of preparation for staging sounds - this can be half of the lesson. In cases where a child has dysarthria or rhinolalia, be sure to perform speech therapy massage and breathing exercises.
“Smile” (“fence”)
Smile without tension so that the front upper and lower teeth are visible. Hold for 5-10 seconds. Make sure that your lips do not turn inward when you smile.
“Tube” (“proboscis”)
Pull your closed lips forward. Hold them in this position while counting from 1 to 5-10. If the child cannot independently stretch his lips, you can invite him to reach for the candy with his lips. You can sing the sound U with your child. In the future, you can alternate exercises 1 and 2
“The house opens” (“hippopotamus”)
Smile slightly, slowly open your mouth, hold your mouth open for 5-10 seconds, slowly close it. The tongue lies quietly behind the teeth or on the lower lip.4. “Curious tongue” Smile, open your mouth slightly and move your tongue back and forth. Place your wide tongue on your lower lip and remove it. The mouth remains open all the time. Do the exercise 8-10 times
“The tongue greets the chin”
Smile, open your mouth slightly and stretch your tongue down to your chin. Do the exercise 5-10 times
“The tongue greets the upper lip”
Smile slightly, open your mouth slightly, place the wide edge of your tongue on your upper lip (with a shortened frenulum, during this exercise you should stroke the tongue with a spatula in the direction from the frenulum to the tip along the underside of the tongue). In the future, you can alternate exercises 5-6: “swing”.
"Monkey"
Open your mouth slightly and place your tongue between your lower lip and lower teeth. The lips are brought together. Hold in this position for 5 seconds
"Bulldog"
From the “monkey” position, move your tongue to a position between the upper lip and upper teeth. Lips close. Hold for 5 seconds
"Hamster"
Mouth closed. The tongue rests alternately on the right and left cheeks, remaining in each position for 3-5 seconds.
"Circle"
Mouth closed. The tongue moves from the inside, smoothly outlining a circle with the tip of the tongue (“bulldog” - right cheek - “monkey” - left cheek, etc., then in the opposite direction). Perform 5-6 circles in each direction.
“Let’s punish the naughty tongue”
Smile, open your mouth slightly, calmly put your tongue on your lower lip, slapping it with your lips, say: Five-five-five-five...”. It's easiest to spank the tip, then spank the middle of the tongue. Slowly move your tongue forward and backward. The exercise relieves excess tension on the tongue.
“Brushing teeth outside”
Smile, open your mouth slightly, show your teeth and run your wide tongue over the outside of your upper teeth, imitating the cleaning movements of a toothbrush. We also brush the lower teeth. Perform each exercise 3-5 times
"Let's bite the tongue"
Smile, open your mouth slightly, bite the tip of your tongue. You can make the exercise more difficult by simultaneously biting your tongue and moving it back and forth. This exercise is good for relieving excessive tongue tension.
"Spatula"
Smile, open your mouth slightly, place the wide front edge of your tongue on your lower lip. Hold in this position for a count from 1 to 5-10.
“Blowing on the spatula”
Move your tongue to the “Spatula” position and blow into a small bottle, onto a pinwheel or a piece of cotton wool. It is fashionable to “draw” a groove in the center of the tongue with a probe for producing whistling sounds. The exercise prepares the tongue well for making whistling sounds. It should be performed after the “spatula” has been created.
"Gorka" ("bridge")
"The wind blows from the hill"
Place the tongue in the “slide” position, and then calmly and smoothly blow along the middle of the tongue. The air should be cold. If, without changing the position of the tongue, you cover your mouth, leaving a small gap between the teeth and blow, then the child may produce the sound S. (do not show the sample!)
“Cleaning the lower teeth” (from the inside)
Smile, show your teeth, cover your mouth and use the tip of your tongue to “clean” your lower teeth from the inside. Move the tongue from side to side, making sure that it is at the gums. The exercise is useful for interdental sigmatism. In this case, it is useful to use a vestibular plate with a flap
"Coil"
Smile, open your mouth. The tip of the tongue rests on the lower teeth from the inside (“mountain”). Roll out the wide tongue forward and move it deep into the mouth (slide). Repeat the exercise 8-10 times at a calm pace. Recommended when preparing the tongue for making whistling sounds.
“Chewing a pancake”
Smile, open your mouth. The tip of the tongue rests on the lower teeth from the inside (“mountain”). Pull the tongue into the “coil” position and bite the curled tongue. Perform 10-15 times. Useful for preparing the tongue for S.
"Cup"
Smile, open your mouth and place your tongue at the top in the shape of a cup. If the “cup” doesn’t work out, then you need to continue doing exercise 10 “Let’s punish the naughty tongue.” During this exercise, it is recommended to help the child lift the tongue with a spatula or finger. Hold in the cup position for 5-10 seconds. Recommended during the period of preparing the tongue for the production of sibilants and sonorates
"Delicious jam"
Smile, open your mouth and lick your upper lip with your tongue in a “cup” shape. Movements are directed from top to bottom. You can continue the movement and remove your tongue into your mouth without destroying the “cup.” You need to ensure that the lower jaw is motionless during this exercise. The exercise helps in preparing for the production of sibilants and sonors.
"Steps"
(alternating: “cup” on the upper lip, “cup” on the upper teeth, “cup” inside the mouth behind the teeth. We hold the tongue in each position for 3-5 seconds.
"Focus"
Raise your tongue to the “cup” position and gently blow on the tip of your nose. You can put a piece of cotton wool on the tip of your nose. During the blast, it will fly straight up. This exercise is great for learning how to speak sibilants and sonorants.
"Don't break the cup"
Give the tongue a “cup” shape and move it back and forth, maintaining the “cup” shape. Hold the tongue in each phase for 3-5 seconds.
“Brushing the upper teeth” (from the inside)
Smile, open your mouth and “clean” your upper teeth from the inside with a wide tongue, moving from side to side. The tip of the tongue moves at the upper alveoli. The exercise is good for developing the upward movement of the tongue for sibilants and sonorants.
"Painter"
Smile, open your mouth and “paint” the hard palate (“ceiling”) with the tip of your tongue, moving your tongue back and forth, stroking the palate
"Drummer"
Smile, open your mouth, place your tongue behind your upper teeth, repeat loudly, clearly, repeatedly: “D-D-D...”. Gradually speed up the pace, do not bring your teeth closer together. Then add movement with a cotton swab, ball probe or finger across the tongue - we get a sound vaguely reminiscent of R
"Horse"
Smile, open your mouth wide and click the tip of your tongue at the top. Let's speed up the pace. Make sure that the lower jaw does not move.
"Fungus"
Smile, suck your tongue to the roof of your mouth so that the hyoid ligament stretches (“mushroom stalk”). Hold your tongue in this position for 5-10 minutes. If you cannot do this, then return to the “horse” exercise. The exercise is aimed at stretching the hyoid frenulum.
"Harmonic"
You can perform this exercise after you manage to keep your tongue in the “mushroom” position. In the “mushroom” position, open and close your mouth (like the bellows of an accordion stretch). The exercise stretches the hyoid ligament well.
"Coachman"
Close your lips and blow hard through them. The lips vibrate and a characteristic “whoa” sound is heard. Option: place the wide edge of your tongue between your lips and blow. The tongue will vibrate along with the lips. Wear a mask. The child spits great while doing this preparatory exercise for the sound R.
"Needle"
Open your mouth, stick out your tongue as far as possible, tense it, make it narrow and hold in this position for a count of 10
"Pendulum"
Pull your tongue out of your mouth into the “needle” position and move it from side to side with a large amplitude. Do this 10-15 times. The lower jaw does not move with the tongue! The tongue does not touch the lower lip
"Turkey" ("talker")
Smile, show your teeth, open your mouth slightly, put your wide tongue on your upper lip and make quick movements with the tip of your tongue along the upper lip back and forth, trying not to lift your tongue from the upper lip. Then turn on the voice. The result will be a funny “chatterbox” (sound similar to “bl-bl...”
"Swing"
Smile, show your teeth, open your mouth slightly, put your wide tongue behind your lower teeth (from the inside) and hold in this position for 3-5 seconds. Then lift your wide tongue by the upper teeth (from the inside) and hold for 3 seconds. So we alternately change the position of the tongue 5-6 times “swing the tongue”. This exercise is useful when working on hissing and whistling sounds.
"Steamboat"
Smile, put your tongue between your teeth, bite it and sing: “YYYYY.” The result will be a sound very similar to L. Don't show the sample! This exercise is basic for setting the L sound.
How to develop a child's speech
We continue the conversation about the development of a child’s speech , which began in the first part of the article devoted to this problem.
The movements of the body and organs involved in speech production have common mechanisms, therefore the development of fine motor skills of the hands directly affects the development of speech. It is for this reason that finger exercises for the development of speech in children should take a strong place in your activities with your child.
Training finger movements will, as it were, prepare a platform for further speech development. You can start training your baby’s fingers within the first 5 months.
Now let's see how you can help your child master their native speech, teach him correct pronunciation, constructing phrases and forming thoughts.
Remember: classes should be held in the most easy, fun and playful way possible. Then they will bring real benefits and bring real pleasure to both of you.
A set of measures for speech development (to be carried out at home):
- Development of fine motor skills
- Speech gymnastics
- Logorhythmics
We do not mention here such areas of work on speech development as speech therapy massage, special exercises for practicing various sounds, developing phonemic hearing, and some others. They are the area of application of exclusively professional knowledge and skills. Here it is better to trust a specialist rather than try to cope with this task yourself.
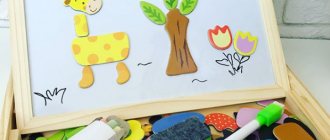
Benefits for developing fine motor skills:
- Matryoshka dolls
- Velvet paper
- Plasticine
- Mosaic
- Laces
- Beans, peas
- Semolina
- Salty dough
- Counting sticks
- Multi-colored clothespins
- Beads
- Cloths with sewn buttons
- Stencils
- Massage ball
- Wooden construction sets
Fine motor skills:
- Passive gymnastics - massage for the development of fine motor skills.
- Active gymnastics - games for the development of fine motor skills: poems and nursery rhymes, finger games, finger theater.
Finger Theater
Finger theater is an exciting game that:
- Stimulates the development of fine motor skills;
- Introduces the child to the following concepts of shape, color, size;
- Helps develop spatial perception (the concepts of “right”, “left”, “next to each other”, etc.);
- Develops imagination, memory, thinking and attention;
- Helps develop vocabulary and activates speech functions;
- Forms creative abilities and artistic skills;
- Introduces basic mathematical concepts.
For children aged 1 – 2 years (using the example of the fairy tale “Kolobok”):
- First, introduce your child to the characters in the fairy tale. Invite your child to look at and touch the figures. Then put each character on your finger in turn and describe it.
- Introduce your child to the name of each finger on his hand. For example, you can say this: “I have a Kolobok sitting on my index finger.”
- Then act out a fairy tale for your child. Place the characters on your fingers and cross your arms. Start telling the story, raising your fingers with the characters as the action progresses. For example, the fairy tale “Kolobok” can be told as follows. Thumbs up with Grandma character. Tell your child that today this hero will bake Kolobok. Rhythmically tap the heels of your palms against each other without releasing your fingers. At the same time, say: “Grandma is kneading the dough.” Using the same principle, play up the appearance of each character.
For children aged 2 – 4 years (using the example of the fairy tale “Kolobok”):
- Ask your child if he remembers the fairy tale “Kolobok”. Remind him if necessary.
- Then ask your child to place the characters on the table in the order they appear in the story. At the same time, ask to characterize each of them according to the principle: “Grandma is old, kind, caring; Kolobok is round, ruddy, mischievous,” etc.
- Ask your child questions about the fairy tale. For example: “Why did grandma decide to bake Kolobok? Why did he leave his grandmother and grandfather? Who did he meet on the way?
- Then act out a fairy tale in front of the little spectator using a finger theater.
- At the end, ask your child to act out a fairy tale in front of you using a finger theater. If necessary, prompt him.